- Ideally, don't spend any money (use what i have already)
- Be able to control forward and reverse for each track.
- In case of having to spend money, make any spend as reusable as possible.
- Make it fun to use! Lights! Buzzers!
Next, i did have the two BBC micro-bit microcontrollers, and i knew that they both did bluetooth. So i had an idea i could build up one as a transmitter/controller and the other as the receiver. It turns out getting them talking isn't hard (at all) but i didn't want to use block code, nor even that online compiler thing.
So then i did some reading and discovered there are heaps of choices when it comes to where you code your microbit, including the Arduino IDE. I had a wow moment at that point :) and quickly dipped into the wonderful world of microbit with the arduino ide thanks to Adafruit. That short tutorial series completely changed my plans, and i learned:
- With the right resources we can achieve amazing things!
- That i can easily code microbit in the familiar arduino IDE ecosystem.
- When doing so i don't need to sacrifice core microbit functionality (like bluetooth or the other sensors etc).
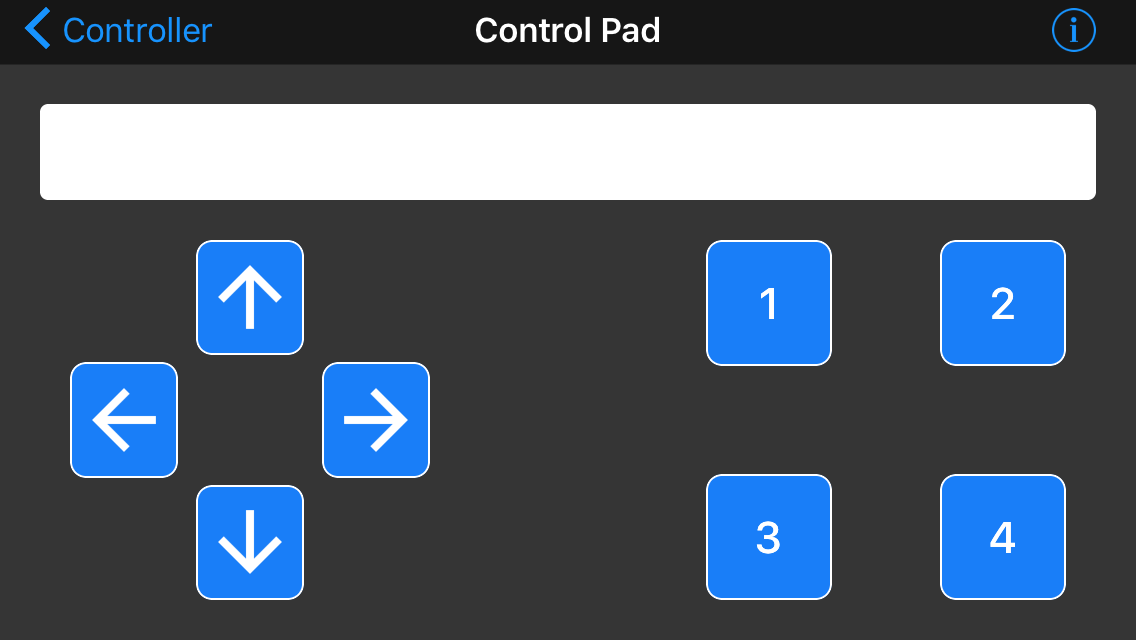
- I don't need two microbits at all, because Adafruit has a BRILLIANT iOS app, and i can control the microbit from there!
- wow!
 |
| Microbit plus jumpers and power cable (to battery terminal). |
I know I'm glossing over things a bit, but seriously that tutorial was awesome, go have a look. So in essence my remote control setup works as follows:
- I power up the L298N which provides 5v to the Arduino
- The microbit is powered from the 3.3v supply on the arduino
- The microbit is paired with my iPhone
- I open the app, connect to the microbit and navigate to the Control Pad
- Hit one of the 4 numbered buttons, and one of those jumpers goes high.
- ..celebrate. It was almost too easy.
Next is then coding the arduino to do sensible things with these inputs..
No comments:
Post a Comment