- I do like fixing things
- Parts are available although they might take awhile to get here.
- I bought two identical cars in case one broke.. ;)
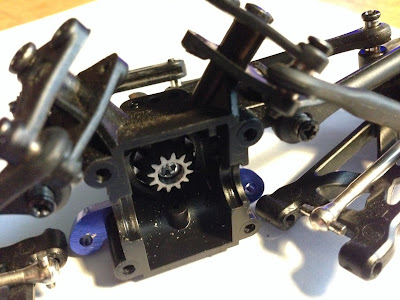
..fast forward a bit .. so anyhow, looks like the front diff and pinion are all intact (not that there's much in the way of grease..):
 |
| The front differential. All good there (but needs lube) |
.. add time .. ok, so found it. There is a very small bolt holding the "Then Cup" (don't ask me, that's what it says on the parts list! ;)) to the front pinion gear. The cup and pinion interlock and the screw holds them together. The screw shouldn't have been loaded rotationally and only under a static load longitudinally, so i can't see how it could shear, yet it has. This pic shows the rear of the front pinion and if you look inside you can see the back of the head of the bolt:
 |
| Left: The "Then Cup" and right: rear side of 12t pinion gear. |
.. fast forward .. i found the part numbers in the manual (I do like that this car has nice exploded parts diagrams). The name of the broken item is the 0109 "Pan head screw" and it's sheared off inside the 0081 "Then cup".
 |
| Appropriate page in the manual.. |
PS: It seems like I'm not the only one who's had issues with this particular bolt.
..fast forward a few days.. parts delayed, bored.. stuff it, I'm going to fix it myself. I drilled out the screw head from the driving gear easily enough (with a drill press). Next i tried to drill out the remainder of the bolt from the then cup, which went amazingly well. I happened to have an M3 tap so i drilled it out to 2.5mm and tapped it from there, which also went amazingly well:
 |
| Tapping Then Cup 0081 out to M3. Tape indicates 8mm depth. |
 |
| I used the longer M3 screw at the rear, cut to length. |
Now putting the rest of the car back together, fingers crossed! :)

No comments:
Post a Comment