- The tracks etc from the Lego Technic excavator (42006)
- A couple of Lego Technic motors and some cogs to gear them down a bit
- A few Lego power cables including a couple of the ones for lights (8870)
- An arduino Uno clone (Freetronics eleven)
- Two BBC microbit microcontrollers
- An L298N motor driver board (these things are neat!)
- A 6s NiMh battery pack (9.6v) with Tamiya RC connector
- A potentiometer, various jumper wires, a random DC motor etc
- And Ben's oscilloscope which needs using before i have to give it back.
I didn't have a perfectly crafted plan, but it was something like this:
- Remember how to drive a DC motor using the L298N with PWM
- Work out how the wiring works for Lego motors and how to connect them to the L298N without cutting their cables (because they're expensive).
- Work out how to control an arduino remotely.
- Shove it all on the tracks and make an remote controlled .. thing.
 |
| Cut these *before* you find out how much they cost. |
 | ||||
| Quite nerdy spaghetti. |
The code* worked ok, so I then moved on to the tracks themselves. I already had this layout from when I'd been mucking around with the tracks as a Lego project. There's one engine per track, and for forward travel obviously they'll be rotating in opposite directions. I just needed to install the battery somewhere and luckily it just fit right in there..
 |
| The tracks; one motor for each track and battery pack |
And again from awhile ago, I'd gear the motors down so they can run at full speed and provide slow powerful motive force, all the torque etc:
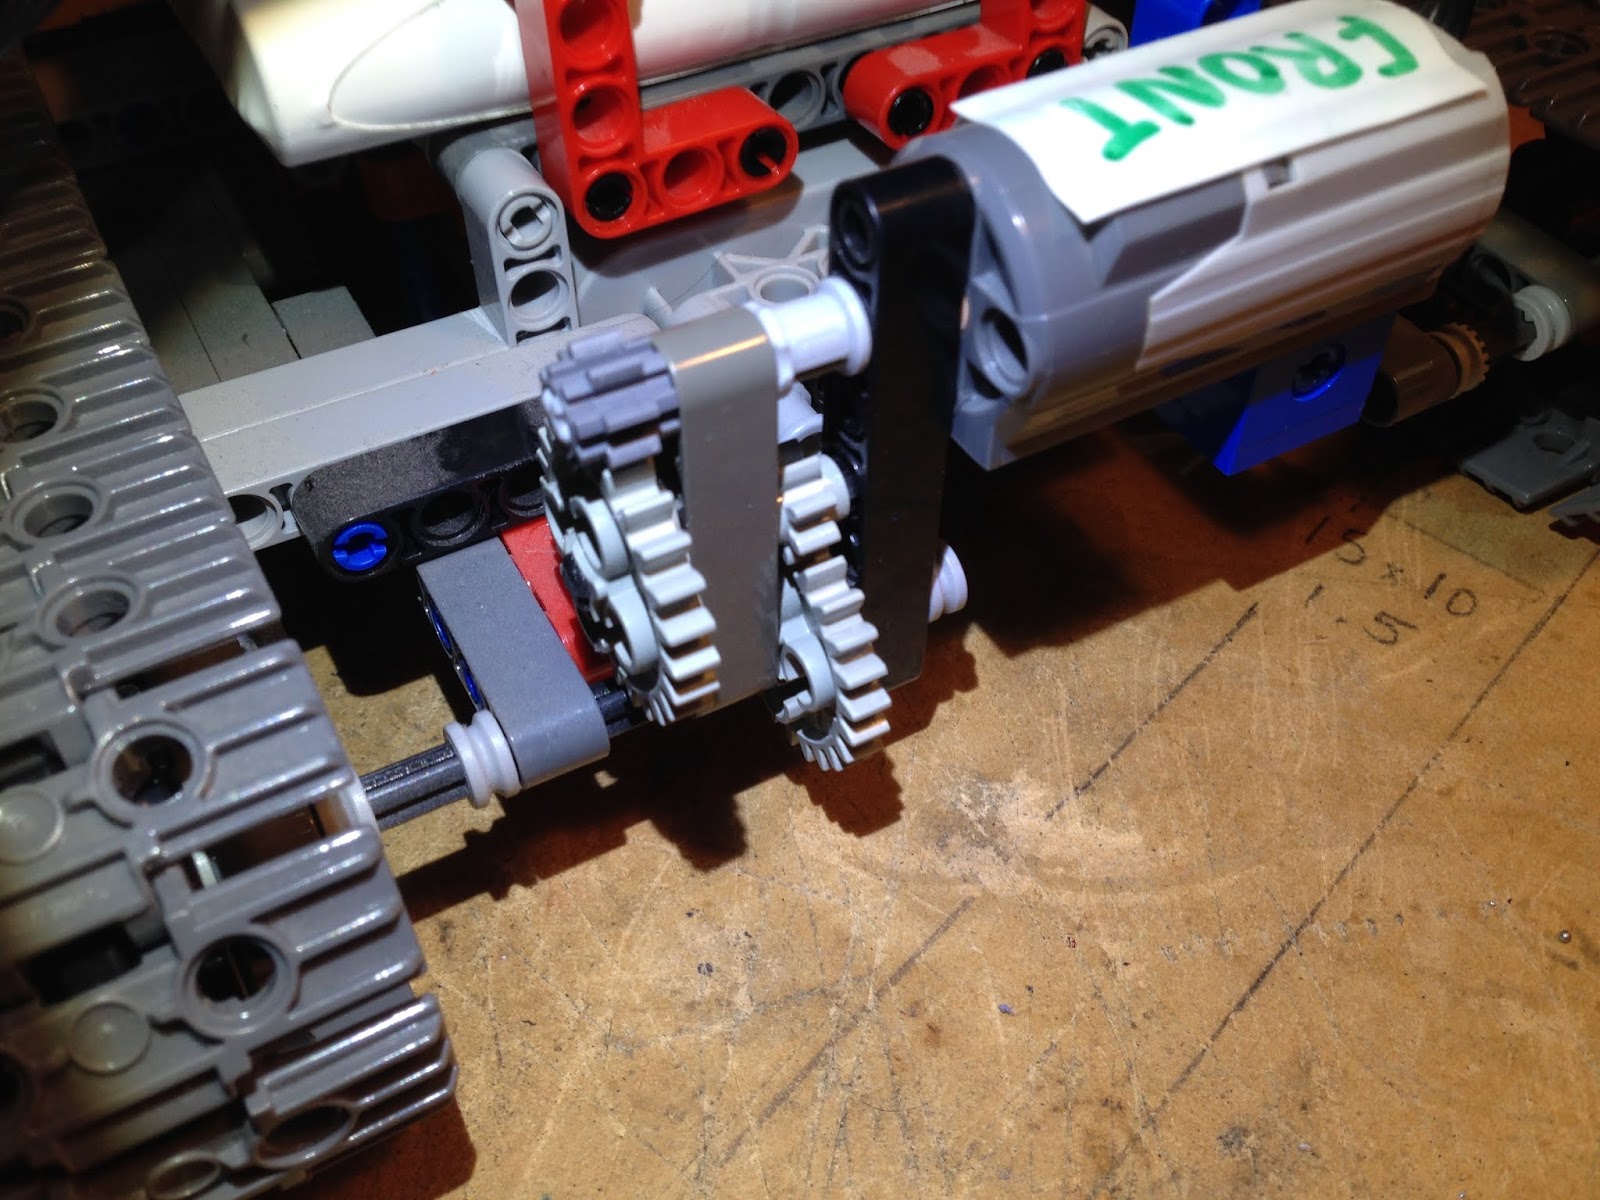 |
| Two stage reduction gears. |
So next was do work out how to do the remote control, and that was a bit more interesting..
No comments:
Post a Comment